
Retro builds, geek culture, and projects nobody asked for — but everyone loves.
Take a reflective walk down nostalgic lane. Here you'll find build guides, random fact finds, reviews, and info dumps — basically anything that catches my retro-obsessed brain.
Follow along if you like. I'm not pushy.

Anyone south of twenty will probably be wondering ‘what the hell is that?’ and why does it need to go in a frame?
Good question! and thanks for tearing yourself away from Love Island or your Snapchat filters for ten minutes and asking.
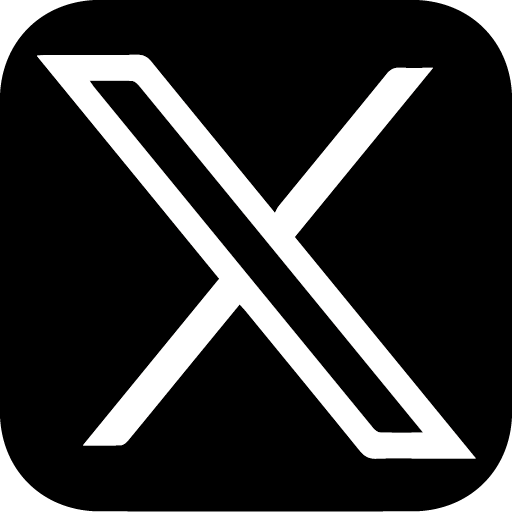
What that is, is a home for some pixel art goodness, housed in a Nintendo Entertainment System game cartridge. Back in the day before DLC and app stores, games mostly came in nicely boxed plastic perfection, and as someone who has dabbled in retro gaming emulation, its probably the part I miss the most. Taking the time to choose a game, take it out the box (assuming its not ripped to shreds) carefully placing it in said gaming machine and waiting….then taking it back out, blowing on it and putting it back in until it works.
Having recently blagged a space in the house to dedicated to work and study I found myself with some space to fill, specifically, next to my recently won at a cinema quiz night (not the quiz part, the raffle part..go me!) movie art poster from the 1966 film ‘Blow Up’.
You would struggle to find any type of project like this on the internet that doesn’t use a Raspberry Pi, the affordable mini, single board computer with a vast array of uses, I myself have been tinkering with these bad boys since their release, all be it in a somewhat amateur fashion.
I already had a Raspberry Pi Zero WH to hand but they are available here and at an unbelievably cheap price!
In addition to the Raspberry Pi there are a few more bits needed for the build…
Blank new NES Cartridge (unless you want to destroy a piece of gaming history…go ahead…criminal!)
3.5″ Inch 480×320 TFT LCD – Uses the GPIO header on the Raspberry Pi (requires some extra steps highlighted below)
3.5″ inch 480×320 HDMI LCD Screen – Uses the HDMI connection (much easier to use) + HDMI Male to Mini HDMI Male
It is important to note that there are two ways to set up the frame and associated slideshow, offline mode and online mode.
Offline mode you can setup the frame and upload the videos by drag and drop or FTP.
Online mode uses the free tier of the Yodeck service, so you are able to upload and create intricate slide shows and even add widgets like clocks or even live streams….gasp!
OFFLINE Mode Setup
You will need internet connection for the initial setup but once complete your frame will run with no need for maintenance or internet connection for upkeep.
STEP 1 – Preparing the SD card
Download latest Raspberry Pi OS – HERE
Use Etcher or equivalent to flash image to SD card (32GB for this example)
Place two files in the root directory of the card…
Create a blank text document and add in the details below..
country=gb
update_config=1
ctrl_interface=/var/run/wpa_supplicant
network={
scan_ssid=1
ssid=“INPUTYOURSSID”
psk=“INPUTYOURPASSWORD”
}
Rename the file “wpa_supplicant.conf” ensuring you remove the .txt file association. This file will configure the network settings.
Create another blank text document and simply rename it to “ssh” this enables you to SSH into your Raspberry Pi.
STEP 2 (A) – Using a screen with no HDMI input
There will be some variation in process and success of this section depending on the screen used, for this example the screen was 3.5inch RPi Display 480×320 Pixel XPT2046)
If you are using a 3.5” or equivalent screen without HDMI (XPT2046 for example) follow the STEP 2 (B).
With the Raspberry Pi connect to the screen using the GPIO ports, place the SD card in and connect the USB power. – (You will not see any activity on the screen as the correct display drivers need to be installed).
Discover the IP address assigned to your Raspberry Pi, you can log into your router or use an app such as ‘Fing’
Once discovered use Terminal (MacOS) or equivalent to SSH into your Pi
$ ssh pi@xx.xx.xx.xx
(default password “raspberry”)
$ sudo apt-get update
$ sudo raspi-config
Make the following amends
7 – Advanced Options
A1 – Expand Filesystem
5 – Interfacing Options
P4 – SPI – Enable
Finish
Display Drivers – Method 1
Download the Waveshare driver – HERE
Move the ZIP to the Pi using Cyberduck or equivalent, place it in the path /home/pi
Back in Terminal
$ tar xvf LCD-show-180331.tar
$ cd LCD-show/
$ sudo ./LCD35-show
Display Drivers – Method 2 (FBCP Framebuffer Copy)
$ sudo apt-get install cmake
$ git clone https://github.com/juj/fbcp-ili9341.git
$ cd fbcp-ili9341
$ mkdir build
$ cd build
$ cmake -DSPI_BUS_CLOCK_DIVISOR=20 -DSTATISTICS=0 -DWAVESHARE35B_ILI9486=ON ..
$ make -j
$ sudo ./fbcp-ili9341
^c
$ crontab -e
At the end, add the line
@reboot sudo /home/pi/fbcp-ili9341/build/fbcp-ili9341 &
$ sudo nano /boot/config.txt
add the lines (changing the resolution settings if needed)
hdmi_group=2
hdmi_mode=87
hdmi_cvt=480 320 60 1 0 0 0
hdmi_force_hotplug=1
STEP 2 (B) – Using a screen with HDMI input
If you are using a 3.5” or equivalent screen with HDMI follow the steps below.
With the Raspberry Pi connect to the screen using a micro HDMI to HDMI cable, and a micro USB to Micro USB connected to the Pi and screen* (or power the screen via the GPIO if supported), place the SD card in and connect the USB power.
Discover the IP address assigned to your Raspberry Pi, you can log into your router or use an app such as ‘Fing’
Once discovered use Terminal (MacOS) or equivalent to SSH into your Pi
$ ssh pi@xx.xx.xx.xx
(default password “raspberry”)
$ sudo apt-get update
$ sudo raspi-config
Make the following amends
7 – Advanced Options
A1 – Expand Filesystem
STEP 3 – Displaying the Video
Method 1 – Using OMXPlayer
Use Cyberduck or equivalent to upload the video file you want to play (ensuring that you set the resolution to the resolution of the screen you are using i.e. 480 x 320 and in the correct formatting i.e. landscape or portrait, using Adobe Premiere Pro or similar).
Place the video in your desired directory, for this example /home/pi/Videos
The video will be played using the built in OMXPlayer
For it to run and display the video on start up the following needs to be added to Crontab (using rc.local has mixed results)
$ crontab -e
At the end, add the line
@reboot omxplayer -p -o local /home/pi/Videos/YOURVIDEOTITLE.mp4 –loop –aspect-mode fill
Exit and save the changes
$ sudo reboo
Method 2 – Using Pi Video Looper (USB Reader) (works best using the HDMI output)
$ sudo apt-get update
$ sudo apt-get install -y git
$ git clone https://github.com/adafruit/pi_video_looper.git
$ cd pi_video_looper
$ sudo ./install.sh
ONLINE Mode using Yodeck
You will need internet connection for the initial setup and for period connection to the internet should you wish to update.
Yodeck requires a connection to the internet at least every 30 days to keep running, it is able to run offline but will start to show warnings the closer it gets to being 30 days offline and will fail to display the content f not connected at this stage.
STEP 1 – Preparing the SD card
Download latest Yodeck Raspberry Pi build – HERE
Use Etcher or equivalent to flash image to SD card (32GB)
Once flashed, in the root directory look for..
SETTINGS.TXT – (This configures the network settings)
Alter the following lines only
[WIFI]
ssid = INPUTYOURSSID
key = INPUTYOURPASSWORD
Whilst you are waiting for the Pi to connect to the internet and download the latest updates, (this may take 5-10 mins) visit Yodeck.com and sign up (note that one screen is free but there are paid plans available for multiple)
STEP 2 (A) – Using a screen with no HDMI input
(There will be some variation in process and success of this section depending on the screen used, for this example the screen was 3.5inch RPi Display 480×320 Pixel XPT2046)
If you are using a 3.5” or equivalent screen without HDMI (XPT2046 for example) follow the steps below.
With the Raspberry Pi connect to the screen using the GPIO ports, place the SD card in and connect the USB power.
(You will not see any activity on the screen as the correct display drivers need to be installed).
For the initial setup you will need to connect the Pi to a screen via HDMI
Once the software has been updated a Registration code will be displayed
Once signed up and logged in, go to the ‘Monitors’ tab on the left-hand menu.
Click +Add Monitor
Enter a name for your screen
Enter the Registration code
Click on the ‘Advanced’ tab and select ‘Security’
Enter a password of your choice in the ‘Remote Support Password’ box
Click ‘Allow SSH on the LAN’
Save and Push to the Player by clicking the button
Discover the IP address assigned to your RaspberryPi, you can log into your router or use an app such as ‘Fing’.
You can also find the local IP address in the ’Status’ tab in the Monitor section on the Yodeck control page.
Once discovered use Terminal (MacOS) or equivalent to SSH into your Pi
v$ ssh user@xx.xx.xx.xx
(password “YOURPASSWORD”)
$ sudo apt-get update
$ sudo raspi-config
Make the following amends
5 – Interfacing Options
P4 – SPI – Enable
Finish
Back in Terminal
$ sudo apt-get install cmake
$ sudo apt install git
$ git clone https://github.com/juj/fbcp-ili9341.git
$ cd fbcp-ili9341
$ mkdir build
$ cd build
$ cmake -DSPI_BUS_CLOCK_DIVISOR=20 -DSTATISTICS=0 -DWAVESHARE35B_ILI9486=ON ..
$ make -j
$ sudo ./fbcp-ili9341
^c
sudo nano /etc/rc.local
and before the exit 0 add this line
sudo /home/pi/fbcp-ili9341/build/fbcp-ili9341 &
NOTE: Currently once rebooted it should continue to display on the tft screen via the GPIO header but occasional it will fail to load the display drivers correctly, should that be the case, simply ssh into the Pi and re-run the following commands.
$ cd fbcp-ili9341
$ cd build
$ sudo ./fbcp-ili9341
Yodeck support are aware and are looking into including this in the future is possible
STEP 2 (B) – Using a screen with HDMI input
If you are using a 3.5” or equivalent screen with HDMI follow the steps below.
With the Raspberry Pi connect to the screen using a micro HDMI to HDMI cable, and a micro USB to Micro USB connected to the Pi and screen* (or power the screen via the GPIO if supported), place the SD card in and connect the USB power.
Once the software has been updated a Registration code will be displayed
Once signed up and logged in, go to the ‘Monitors’ tab on the left hand menu.
Click +Add Monitor
Enter a name for your screen
Enter the Registration code
STEP 3 – Using Yodeck
Yodeck enables you to create and schedule content for your screens effortlessly from the web, using your computer or smartphone.
You can upload videos and images along with using widgets, it is also capable of displaying live websites or live YouTube streams.
It is free for one screen but does have payment options for multiple screens, it makes it easy to rotate the display and create custom layouts that can show multiple assets at any time.
The best process is to upload media (image or video) and create a Playlist, then place this Playlist on a Layout that suits the screen, being sure that all the content fits and does become cropped. You can then set this Layout as your default screen display should you wish, or use the calendar scheduler to create timing for displays etc.
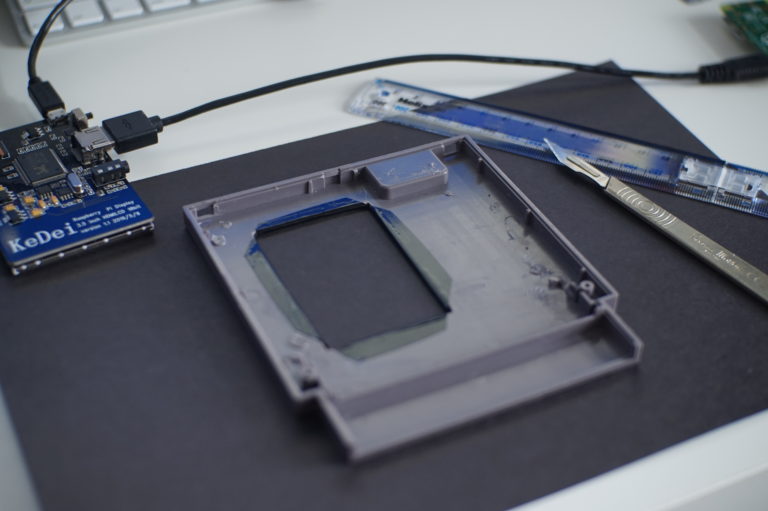
Separate the two halves of the case by unscrewing the back section.
Place masking tape over the area of the label that is to be cut.
Measure the viewing area on the screen and mark out a box in the label area where the screen is to be placed.
Use the Dremel to cut the square out of the plastic taking care not to melt the plastic too much. NOTE – You may also need to trim some of the plastic support areas inside the frame to allow for the screen and Pi to be placed.
Remove the masking tape and smooth the cut lines with the file and scalpel blade.
Clean the label area and apply the black vinyl, do not cut to close along the window for the screen, leave 3-5mm to wrap around the cuts in the case (this can also help hide the cuts if they are not perfectly square).
Use the glue gun to secure the screen in place. NOTE – If you are mounting the cartridge in a frame, use the glue to also secure the mounting card, this can also help hide some of the cable management.
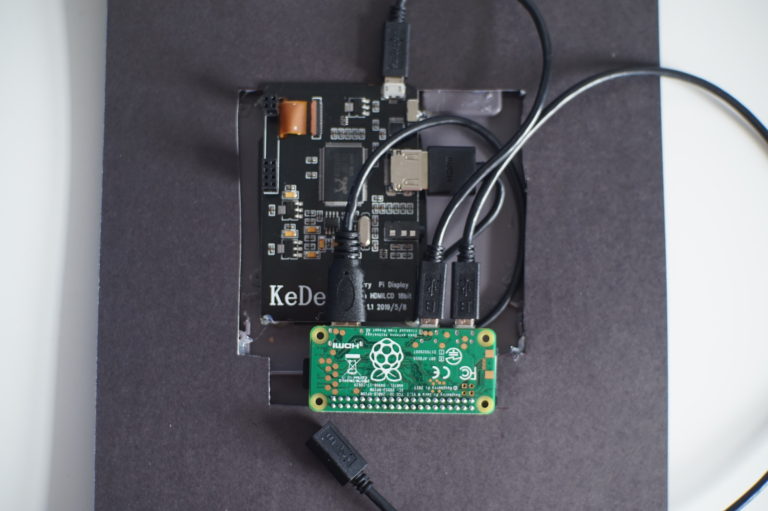
Once everything is working, use the hot glue to fix the cables and Pi Zero in place (you can use some of the existing standoffs in the case the give the Pi room for cooling.
When putting the cartridge in a frame cut a few holes in the supporting hardboard backing of the frame to allow for more cooling if needed.
I have used a battery pack glued to the rear of the frame that allows for around 6-7 hours of viewing before it needs charging, you could, however, run it directly from USB power is it is to be placed on a shelf.

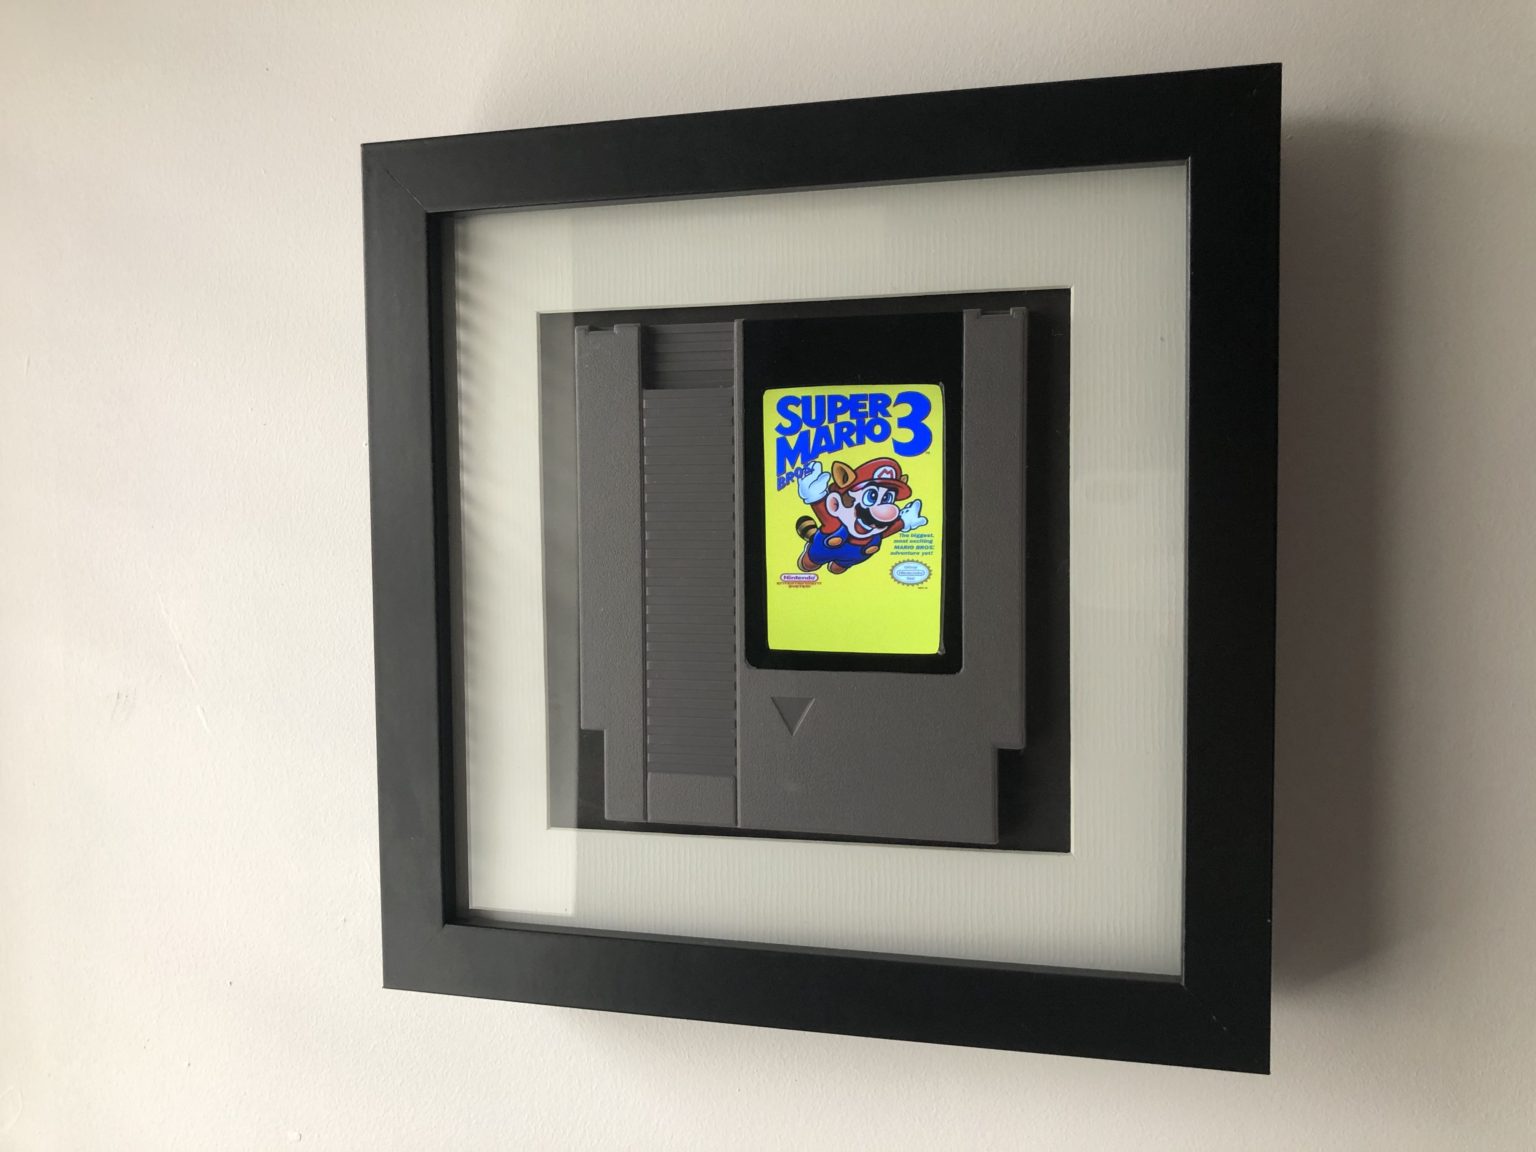
I have mine displaying a mixture of content, mostly label artwork followed by short snippets of the game. Mixed with some nostalgic advertisements for the NES.
It also displays the label of a demo game I produced for work using UNITY…pixel art based of course, it’s an old school Zelda type RPG for new starts to a company, called Induction Quest….hey give me a break, it’s a work in progress!
As for the next step….I may have ordered another Raspberry Pi Zero, SNES cartridge, and a 2.4″ screen.